 Skip to content


Enhancing Cabin Luxury: Practical Advice for Modern Vehicle Upholstery Upgrades
A well-planned upholstery upgrade can make a vehicle cabin feel quieter, more supportive and noticeably more refined. The best results come from looking beyond surface materials and considering what lies beneath them, how the cabin is used, and which finishes will withstand daily wear. Before booking any work, inspect the seats, door panels, headlining and trim in daylight. This gives you a clear view of sagging areas, faded fabric and small defects that could affect the finished result.
Decide what needs to change
Start with the problems you notice on ordinary trips. A flattened driver’s seat may cause discomfort after an hour, while loose door fabric can create an irritating rattle. If the cabin already feels comfortable, replacing every upholstered panel could add cost without delivering much benefit.
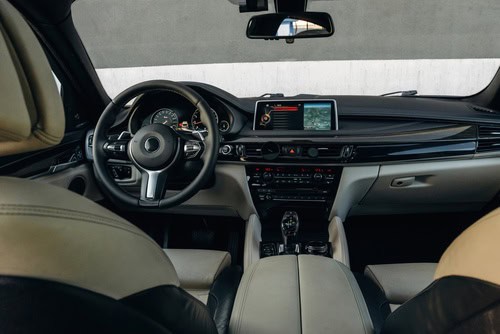
Create a priority list based on condition, comfort and visibility. Seats usually come first because they affect posture and dominate the interior. The armrests, door inserts, and the centre console can follow. Many suggested interior comfort upgrades also focus on frequently touched areas, where a modest improvement can make the whole cabin feel better maintained.
Get the cushioning right first
New covers won’t disguise foam that has collapsed, split or lost its shape. Press across the seat base and backrest to find soft patches or hard edges. Uneven resistance often points to worn cushioning, especially on the outer bolster where drivers slide into the seat.
For repairs or custom projects, accurately cut furniture foam can suit upholstery jobs that require a specific size, thickness, or shape. Measure the existing insert at several points and record its widest dimensions before removal. If you’re changing the seat profile, test the proposed thickness before fitting the final cover. Even an extra centimetre can alter headroom, pedal position and support behind the knees.
Pick materials for real life
Choose upholstery based on how you use the vehicle, not solely on a small showroom sample. Leather can create a polished finish and is relatively easy to wipe clean, though it may feel hot in direct sun. Modern synthetic alternatives can offer a similar appearance with simpler maintenance. Woven fabrics tend to feel warmer in winter and can provide better grip during longer journeys.

Ask for larger samples and place them inside the cabin for a few days. Check their colour in morning light, bright sun and after dark under the interior lamps. Also consider abrasion resistance, UV stability and cleaning instructions. A pale material may suit an occasional-use car, while a busy family vehicle generally benefits from a textured mid-tone finish that hides minor marks.
Build a coordinated cabin
Luxury comes from consistency across the cabin. Limit the design to one main upholstery colour, one supporting shade and a small amount of contrast stitching or piping. Too many finishes can make individual upgrades look disconnected, even when each material is expensive.
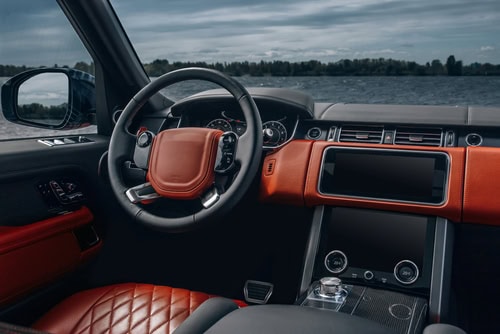
Small details deserve attention because they’re close to the driver. Matching the gear gaiter, armrest and door inserts can create a deliberate visual line through the interior. Guides to high-end cabin upgrades also show how restrained accessories and coordinated textures can lift the overall effect. Keep decorative stitching away from areas that experience heavy friction, as raised threads may wear quickly.
Plan the fitting carefully
Professional fitting is usually sensible for shaped seat covers, integrated heating elements and complex door panels. Request photographs of comparable work and ask how the fitter handles existing clips, airbags, and electrical connections. Confirm which parts will be reused and whether the quote includes removing old adhesive, repairing foam and disposing of worn materials.
If you’re handling a simple panel yourself, photograph every stage of disassembly and store fixings in labelled containers. Avoid pulling fabric too tightly around curves, since excess tension can distort seams or loosen adhesive during warm weather. Allow enough time for glues to cure before reinstalling the panel, following the manufacturer’s stated temperature and ventilation instructions.
Protect the finished upholstery
Regular, gentle care will preserve the finish better than occasional aggressive cleaning. Vacuum seams and creases with a soft attachment, then use a product approved for the exact material. Apply cleaners to a cloth first so the liquid doesn’t soak into the perforations, stitching, or the cushioning below.
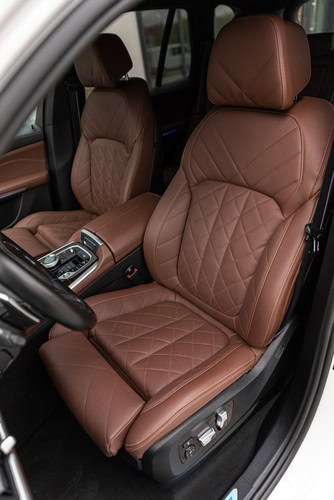
Deal with spills promptly and blot them up rather than scrub. Sunshades can reduce heat and fading when a vehicle spends long periods outside, while rotating removable cushions helps them wear more evenly. Keep a small offcut of the chosen material after installation too. It provides a useful colour reference for future repairs and may allow a trimmer to patch a minor damaged area without replacing an entire panel.
The final inspection should take place from the driver’s seat. Check that seams sit straight, controls remain easy to reach, and the new cushioning supports you without changing your driving position. A cabin feels genuinely luxurious when every upgraded surface looks settled, works properly and remains comfortable beyond the first few trips.